


You must have seen a lot of Backup & Restore Apps on Google Play store, but most good ones would likely require your phone/tab to be rooted or boot-loader unlocked. Titanium Backup is one such popular app which requires root access of the android Phone or Tablet. Also such apps usually backup the data onto your device Internal storage or SD card.
So what if we want to do a automated backup of android phone onto a PC or Mass Storage connected to the PC ? We now discuss the steps to easily perform such a backup.
Steps to check or Install USB Drivers in PC:
1. Go to Device Manager on PC: to do right click My Computer>Properties>Device manager.
2. The Device Manager window opens up:

3. In the List look for Android Device. If you see Android Composite ADB Interface below that, means that your drivers are already installed and ready. If there is an Other Devices entry with a yellow error notification that would indicate that the USB driver needs to be installed.
4. Right click the error icon>click Update drivers>click Browse my computer for driver software
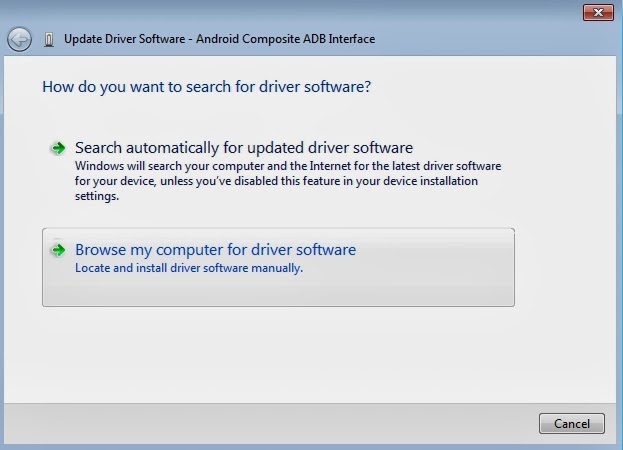
It will open the following window. Click Browse and select the path for the driver folder. The drivers must be downloaded and saved from this Google Link. If your device doesn't work with the Google driver then make a search online for device specific drivers and download them.

5. Click the Next button. The Drivers will install and then you will see the Android Composite ADB Interface in the Device Manager list as shown in the first image above.
Once it is confirmed that the USB drivers have been installed, proceed with downloading the Android SDK from Google website. The zipped folder size is about 480 MB but doesn't take much time to download.
Once downloaded, extract (unzip) the folder at some location. Then create a folder at your root directory (which in most cases is C:\ drive); name the folder, say Development. Paste the unzipped folder in the Development folder.
Your folder path would look close to this: C:\Development\adt-bundle-windows-x86-20131030\sdk\platform-tools\
The ADB and the Fastboot tool now lie in the above mentioned folder path.
Now we can proceed with connecting the Android device to the PC using a USB cable and test the ADB command line interface.
Before connecting the device through USB cable, enable USB Debugging on the device.
Steps to enable USB Debugging on the Android Device:
1. On your android device go to Settings>About Tablet/phone>click on Build Number (7 times). With that you have activated the Developer options and would see the same in the Settings page now.


2. Click on Developer Options and in the opening page tick the USB debugging to enable the same.

3. The Desktop Backup to be performed may require a password to be created. So click Desktop backup password and the following screen opens:

4. If you are setting the password for the first time, keep the first field blank and enter your preferred password in the next 2 fields. Click Set backup password to set the password.
Working on ADB:
Now the prerequisites for working on ADB have been completed. On windows explorer go to the path where your ADB and fastboot applications are present which is : C:\Development\adt-bundle-windows-x86-20131030\sdk\platform-tools\
1. Press SHIFT + Right Click to get following popup list and then click on Open command window here. This will open the command prompt window shown below in red:


The path you see above is where the ADB commands are to be entered.
2. Connect the Android device using a USB cable, to the PC. Ensure that the USB Debugging is enabled on the device.
Now enter the following command:
> adb devices

If everything is okay, the command will result in the device list as shown in above snapshot.
The ADB command is working so we can now start with the backup process.
3. Enter the following command:
adb backup -apk -shared -all -f C:\backup20111230.ab
where C:\backup20111230.ab is the file name and path of of the backup file you wish to create on the PC or Portable Mass Storage. You can give any name or path but should end with a .ab file extension. On successful command, the following screen would appear on the device:

Click on Back up my data and the backup operation of the Android device would begin as shown in the snapshot below:

The backup may take 15-35 minutes depending upon the device and also the quantity of apps and media present in the device. When the backup completes a Backup complete message may appear on the device screen or it would return to the home screen.
Restoring a backup when needed:
When needed to restore the backup back into the device, follow the same steps for connectivity and enter the follwoing command:
adb restore C:\backup20111230.ab
and the following screen shall appear on the android device:

Similar to the backup, it will consume similar times for the backup to be restored on the device. Expect every app to be running with even login credentials in place.
**************
If you have any questions, please post in the comments section below.

No comments:
Post a Comment
Make Comments Interactive and Useful. No Spam please. Thank You.